On an automotive interior / structural-parts assembly line, the hard part isn't "getting a clear shot of one carrier" — it's making sure every unit is assembled in the same order: load the main carrier, install workpieces 1 / 2 / 3, fasten screws, connect clips and harness, then final-check and release. A missing workpiece or a missing screw must be caught right there.
This article is based on a real assembly-monitoring video and the VisionAgent UI, laid out as field scene → process timeline → workflow / events / state machine / parameter page → runtime dashboard. The UI screenshots are drawn to match the product's real controls and wording, aligned with the actions in the video.
The real assembly station in the video
A vertical camera frames the black injection-molded carrier assembly mounted on a fixture: an operator (in a red plaid jacket) installs workpieces onto the main carrier one by one, fastens screws with an electric screwdriver, and connects clips and harnesses. The vision system outlines targets with a cyan semantic-segmentation mask and labels them "Workpiece 3" and so on; the background shows part racks, pneumatic hoses and the jig — this is exactly the field that automotive parts process monitoring must handle.
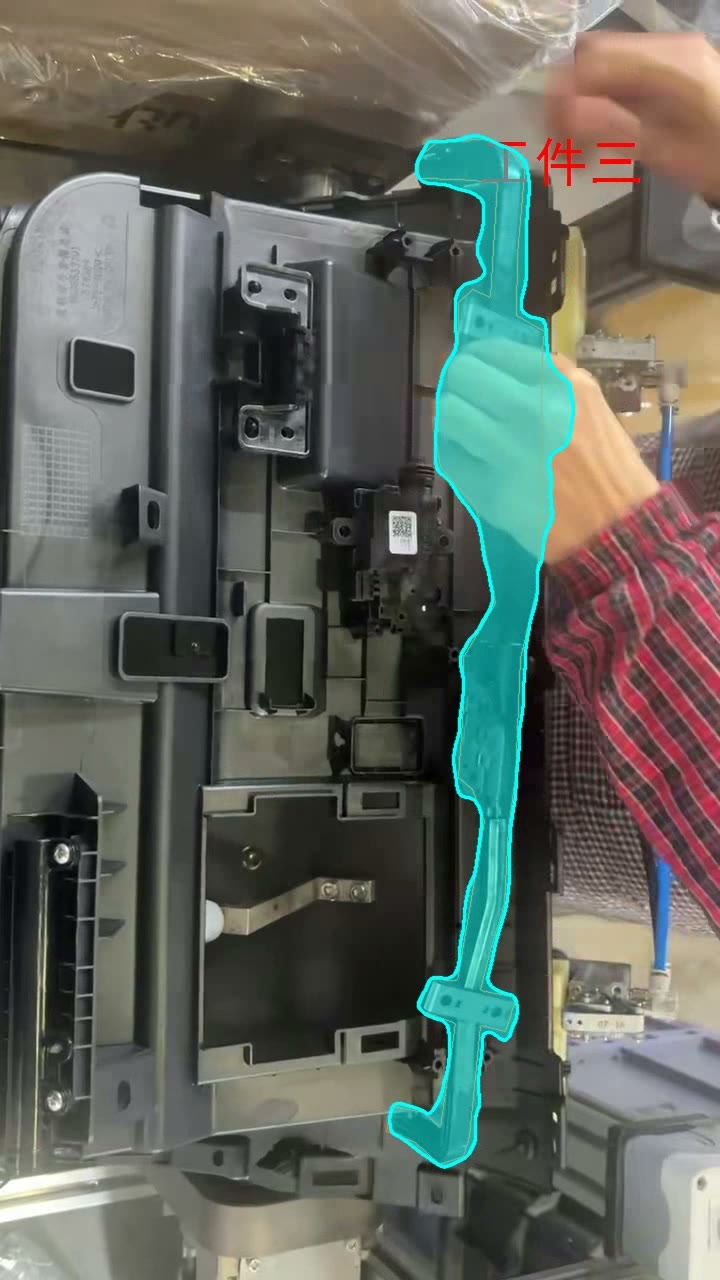
▲ Field: AI segmentation mask marks "Workpiece 3", assembling
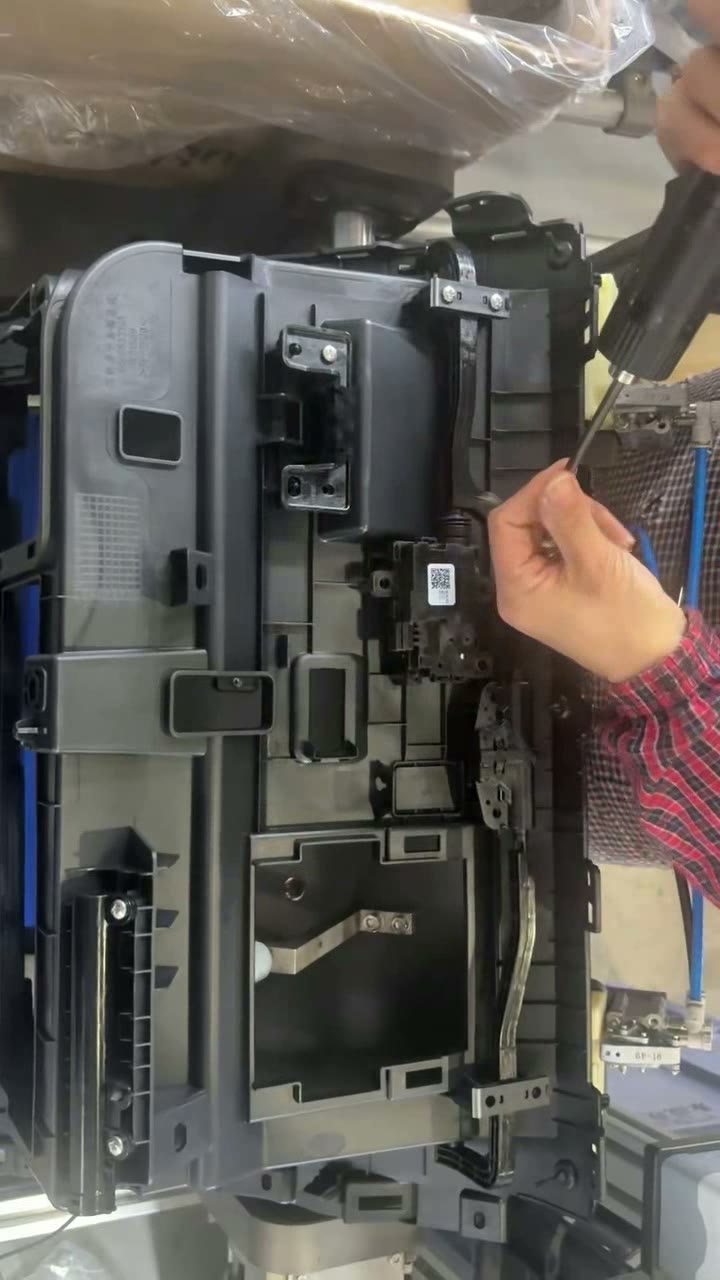
▲ Field: fastening screws with an electric screwdriver
Six steps: what each one checks
The runtime checklist matches the state-graph event tensor — six ordered steps per the real actions in the video:
A missed assembly step costs more than a surface flaw
A missing workpiece, a missing screw or an unconnected harness often only surfaces at vehicle assembly or at the customer. Process monitoring must lock "order + presence + count" on the line side.
Workflow: a five-operator tensor flow
Create a project "Automotive Parts Assembly" and drag operators from the left library, then connect them (matching the real canvas):
▲ Tensor-flow canvas: Camera → Preprocess → Segmentation → Events → State Machine (real UI style)
Orchestrating events: the GPU Event Orchestrator
Open the "GPU Event Orchestrator"; the header shows "Configuring event: Install workpiece 3". Drag "Object Present" from the primitive library:
- The state-machine list on the right: E0 main carrier, E1 workpiece 1, E2 workpiece 2, E3 workpiece 3, E4 screw fastening, E5 clip / harness… unfinished steps show "To configure";
- Miss-prone steps can attach "Object Absent" or a count primitive to drive the interception branch.
▲ GPU Event Orchestrator: event "Install workpiece 3" = primitive "Object Present" (real UI style)
State machine: the S0–S6 ring
- S0 await carrier —E0 load→ S1 await wp1 —E1→ S2 await wp2 —E2→ S3 await wp3 —E3→ S4 await fasten —E4→ S5 await connect —E5→ S6 release;
- after E5 connection, it returns to S0 — one loop per unit;
- the event tensor on the right lists EØ (void) and the assembly events E0–E5; the state-action tensor is kept in sync.
▲ State-graph editor: automotive parts assembly ring S0–S6 (real UI style)
Camera & page parameter configuration
Open "Parameter Config" and switch to the Page Params tab. The "Defect Stats" on the left align with the assembly steps, making it easy to count misses by NG type:
- Columns: Defect code (NG0…NG5), Defect name (main missing, wp1 missing, wp2 missing, wp3 missing, screw missing, clip/harness open), Count;
- You can "add / remove defect types"; edit name and description on the right, then "Save parameters" to apply;
- Result display: mask ON, defect name ON, font size 40, line width 2 — matching the on-site segmentation mask;
- On the camera side, configure channel, exposure and ROI at the "Industrial Camera" node so the whole station is framed.
| Defect code | Defect name | Count |
|---|---|---|
| NG0 | Main carrier missing | 0 |
| NG1 | Workpiece 1 missing | 1 |
| NG2 | Workpiece 2 missing | 0 |
| NG3 | Workpiece 3 missing | 2 |
| NG4 | Screw missing | 3 |
| NG5 | Clip/harness open | 1 |
▲ Parameter Config · Page Params: defect types & result-display settings (real UI style)
Go-live: video + six-step checklist
- Left: live view + segmentation mask, marking "Workpiece 3" and screw fastening;
- Right: a six-step button checklist — main carrier, workpieces 1 / 2 / 3, screw fastening, clip connection; finished steps get a green tick;
- Verdict: all pass → release allowed; any step "object absent / count short" → intercept and log the matching NG.
▲ Runtime monitor: live recognition on the left, six assembly steps advancing on the right
▲ Live footage: the full automotive parts process monitoring clip
Comparison table & takeaways
| Aspect | Traditional assembly line | VisionAgent automotive parts assembly |
|---|---|---|
| Recognize parts | Team-lead spot checks | Semantic segmentation identifies the main carrier and workpieces 1 / 2 / 3 in real time |
| Manage order | Habit and paper SOP | State graph S0–S6 enforces the order |
| Manage misses | Found at vehicle assembly or by customer | Event "object present" step gating + NG stats |
| Manage fastening | Relies on tools and diligence | Screw "count primitive" + position constraint, double confirmation |
| Keep records | Paper ticks filled in later | Step trace and defect counts logged automatically |
- Business requirement: each unit finishes all six steps; workpieces and screws must not be missed;
- Decision rule: the current state only accepts its matching event; release is allowed only after everything is complete;
- Software config: five-operator tensor flow + GPU event orchestration + state graph + page params (NG dictionary).
Four questions run through it all: what the system looks at, what "complete" means, when to intercept, and how results reach the report.
In closing
The hard part of automotive parts assembly monitoring isn't recognizing one workpiece — it's stringing recognize-in-place → report event → advance state → NG stats → release into a chain the floor is willing to use and quality can stand up to review.